
Building Your First AI-Powered Workflow in Azure (Step-by-Step)

By this point, we’ve talked about Azure Front Door, messaging services, and Azure AI Foundry.
Now let’s actually build something.
In this blog, I’ll walk through a simple but practical AI-powered workflow using Azure services. Nothing overly complex, just something that shows how all the pieces fit together.
The Goal
We’re going to build a simple system that:
- Receives an event
- Processes it
- Uses AI to understand it
- Takes action automatically
Think of something like a support ticket system or document processor.
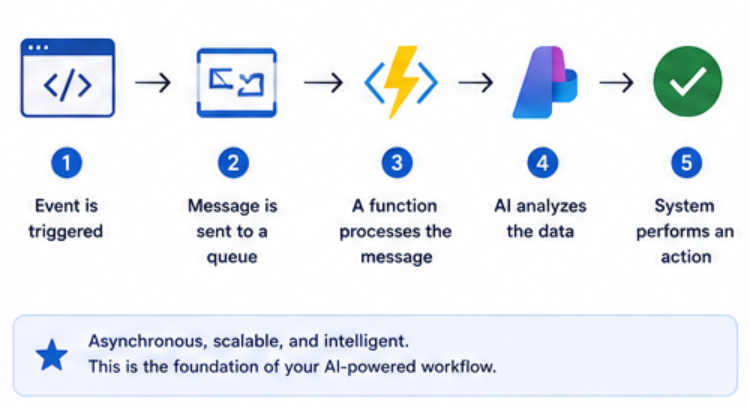
The Architecture
Here’s the high-level flow:
- Event is triggered
- Message is sent to a queue
- A function processes the message
- AI analyzes the data
- System performs an action
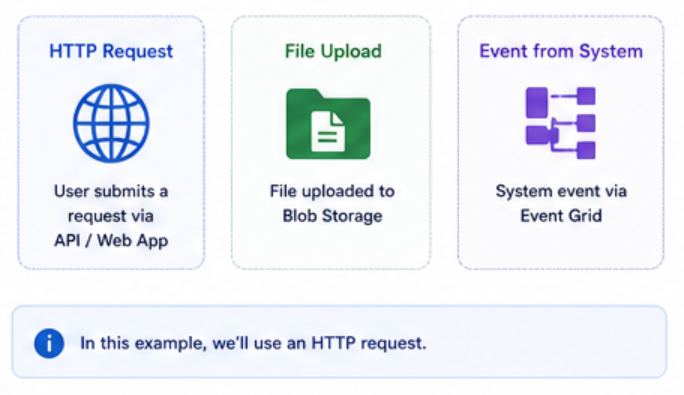
Step 1: Choose Your Trigger
First, decide how your workflow starts.
Common triggers:
- HTTP request (user submits form)
- File upload (Blob Storage)
- System event (Event Grid)
For this example, let’s keep it simple:
A user submits a request via an API.
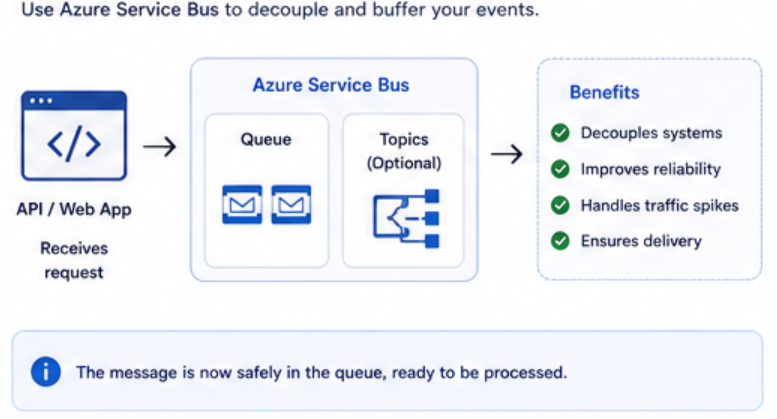
Step 2: Send the Event to a Queue
Instead of processing everything immediately, send the request to a queue.
Why?
- Decouples your system
- Improves reliability
- Handles spikes in traffic
You can use:
- Azure Service Bus (recommended for most cases)
Flow:
- API receives request
- Message is pushed to Service Bus
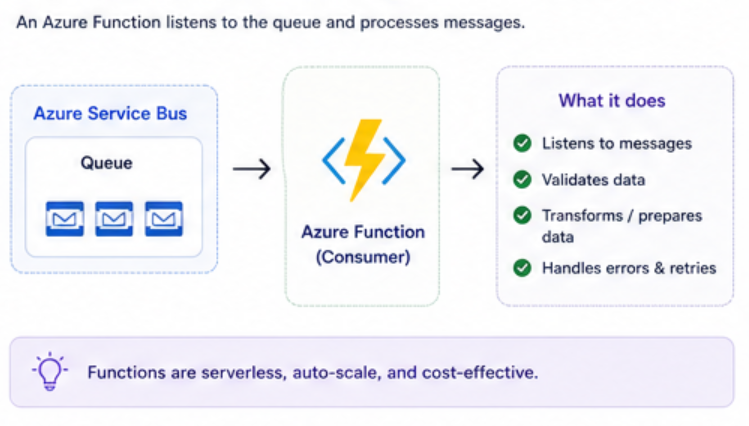
Step 3: Process the Message
Now you need a consumer.
This is usually:
- Azure Function
- Container App
- App Service
For simplicity, use an Azure Function.
What it does:
- Listens to the queue
- Picks up messages
- Prepares data for AI processing
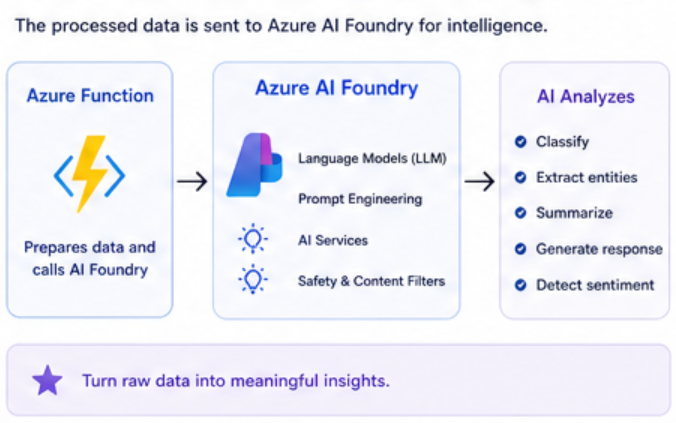
Step 4: Send Data to Azure AI Foundry
Now comes the interesting part.
Take the message and send it to Azure AI Foundry.
Example use cases:
- Classify the message
- Extract important details
- Generate a response
For example:
Input: “User cannot login and is getting an error”
AI Output:
- Category: Authentication
- Priority: High
- Suggested response: Reset password instructions
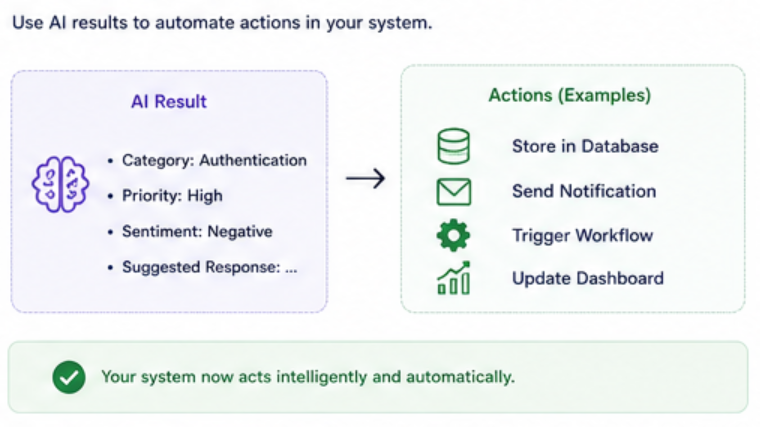
Step 5: Take Action
Once AI gives you the result, your system can act on it.
Examples:
- Store results in a database
- Send a notification
- Trigger another workflow
- Update a dashboard
This is where your system becomes automated.
Putting It All Together
Here’s the full flow again:
- API receives request
- Message goes to Service Bus
- Azure Function processes it
- AI Foundry analyzes it
- System performs action
This is your first AI-powered workflow.
Real Example
Let’s make it more concrete.
Support Ticket System
- User submits ticket
- Ticket goes to Service Bus
- Function picks it up
- AI:
- Classifies issue
- Assigns priority
- Suggests response
- System routes ticket automatically
No manual triage needed.
Things to Watch Out For
1. Latency
AI calls take time.
If your workflow needs to be instant, consider:
- Async processing
- Caching results
2. Cost
Every AI call has a cost.
Control usage by:
- Filtering what goes to AI
- Avoiding unnecessary calls
3. Error Handling
Things will fail.
Make sure you:
- Retry failed messages
- Use dead-letter queues
- Log everything
Key Takeaways
- Use messaging to decouple your system
- Use AI where interpretation is needed
- Keep workflows simple at the start
- Build step by step, not all at once
Final Thoughts
This is just the beginning.
Once you understand this pattern, you can extend it to:
- Document processing
- Chat systems
- Recommendation engines
- Real-time analytics
The goal is not to build something complex.
The goal is to build something that works, then make it smarter over time.